> For the complete documentation index, see [llms.txt](https://help.mimeeq.com/llms.txt). Markdown versions of documentation pages are available by appending `.md` to page URLs; this page is available as [Markdown](https://help.mimeeq.com/configurator/advanced-customisation/morph-targets.md).

# Morph Targets

Learn how to prepare Blender shape keys, configure slider widgets, and connect them to 3D model morph targets in Mimeeq.

## Morph Target - Setup Guide

## Introduction

Morph Targets allow customers to change the shape or dimensions of a 3D product using a Slider widget. They can be used for adjustable properties such as width, length, depth, height, etc. For example, a single *Width* slider can extend a tabletop while simultaneously moving its legs and adjusting its shadow. The slider’s minimum and maximum values represent the two shapes prepared in the 3D model. Mimeeq automatically calculates the intermediate states.

## Before You Begin

The GLB must contain correctly prepared Morph Targets. Morph Targets are called **Shape Keys** in Blender. They work by changing the positions of existing vertices between two states:

* Shape Key value `0` represents the base state.
* Shape Key value `1` represents the final state. Mimeeq maps the Slider widget’s minimum and maximum values to this `0–1` range.

For example:&#x20;

<table data-header-hidden="false" data-header-sticky><thead><tr><th>Blender value</th><th>Mimeeq slider value</th><th>Result</th></tr></thead><tbody><tr><td> <code>0</code> </td><td> 1200 mm </td><td> Minimum table width </td></tr><tr><td> <code>1</code> </td><td> 2400 mm </td><td> Maximum table width </td></tr></tbody></table>

The states between these values are calculated automatically. Keep in mind that a Morph Target cannot add or remove vertices. The mesh must have the same vertex count and topology in both states.

![](https://621103948-files.gitbook.io/~/files/v0/b/gitbook-x-prod.appspot.com/o/spaces%2FsqWfi8ifBhTdkvf1vOlY%2Fuploads%2FpVEktG9unbiraH0aGl5Z%2Fmorph-target-stages_1gp0ywc.jpeg?alt=media)

## Blender - How to Prepare Morph Targets

### Adding Shape Keys

For each mesh that needs to respond to the slider:

1. Select the mesh.
2. Open **Object Data Properties**.
3. Find the **Shape Keys** section.
4. Click **Add** to create the `Basis` Shape Key.
5. Click **Add** again to create the Shape Key for the required change.
6. Rename the new Shape Key, for example `Width`, `Length`, or `Depth`.

The name can be chosen freely. However, every mesh controlled by the same slider must use exactly the same Shape Key name. For example, if the tabletop, legs, and shadow are controlled by the Width slider, all relevant meshes should contain a Shape Key named `Width`. The order of the Shape Keys does not matter

### Creating the Target State

After adding the Shape Key:

1. Select the new Shape Key—not `Basis`.
2. Make sure its value is set to `0`.
3. Enter **Edit Mode**.
4. Select the vertices that need to change.
5. Move them into the final position.
6. Return to **Object Mode**.

The edited position is saved automatically as the Shape Key’s value of `1`. You can use the Shape Key value field to preview the complete transformation from `0` to `1`.

### Moving Complete Components

Morph Targets can also reposition complete components. For example, when making a table wider, the legs may need to move outward without changing their shape. To do this, include all the leg’s vertices in the Shape Key and move them to their final position. Do not use a separate standard animation for components that need to follow the same Slider widget. Prepare their movement as part of the corresponding Morph Target.

### Preparing Shadows

If the product includes baked shadow geometry, it should also respond to the relevant slider. Prepare the shadow mesh so it follows the product’s changing dimensions and the positions of components such as legs. Pay particular attention to the shadow’s topology. Additional vertices or edge loops may be required to preserve the intended shadow shape while the model changes.

![](https://621103948-files.gitbook.io/~/files/v0/b/gitbook-x-prod.appspot.com/o/spaces%2FsqWfi8ifBhTdkvf1vOlY%2Fuploads%2F1Qi6URd9uRMxj9TObhNj%2Fmorph-target-shadows_sve1o6.png?alt=media)

### Exporting the Model

Once all Morph Targets are ready:

1. Test each Shape Key in Blender.
2. Confirm that the complete model transforms correctly.
3. Export the model to GLB using the standard export process.
4. Add the GLB to the product in Mimeeq.
5. Reload the meshes.

{% hint style="info" %}
Mimeeq automatically detects the Morph Targets included in the file.
{% endhint %}

## Mimeeq App - How to Create a Slider Widget

### Creating Slider Widget

Once the GLB has been added:

1. Open the configurator you want to edit.
2. Go to the **Options** tab.
3. Click **New** to create a widget.
4. Enter the widget name, for example `Width`.
5. Set **Mode** to **Slider**.
6. Add at least one value range.
7. Configure the Slider settings.
8. Save the widget.

![](https://621103948-files.gitbook.io/~/files/v0/b/gitbook-x-prod.appspot.com/o/spaces%2FsqWfi8ifBhTdkvf1vOlY%2Fuploads%2FFjU3J97h7aKKBtlIew9g%2Fslider-widget_1altqas.png?alt=media)

### Configuring a Range

A slider must contain at least one range. For example:

* Minimum: `1200`
* Maximum: `2400`
* Step: `100`
* Unit: `mm`
*

This creates the following available values: `1200, 1300, 1400, 1500 … 2400` The minimum value maps to Morph Target value `0`, and the maximum value maps to Morph Target value `1`.

### Using Multiple Ranges

You can add multiple ranges with different step sizes. For example:

<table data-header-hidden="false" data-header-sticky><thead><tr><th>Range</th><th>Minimum</th><th>Maximum</th><th>Step</th></tr></thead><tbody><tr><td> 1 </td><td> 42 in </td><td> 48 in </td><td> 2 </td></tr><tr><td> 2 </td><td> 48 in </td><td> 60 in </td><td> 4 </td></tr></tbody></table>

Ranges do not need to be continuous. If a value is not available between two ranges, the slider moves to the nearest valid step.

![](https://621103948-files.gitbook.io/~/files/v0/b/gitbook-x-prod.appspot.com/o/spaces%2FsqWfi8ifBhTdkvf1vOlY%2Fuploads%2FfTnoXMOCbWdtrc1KQWpX%2Ftwo-ranges_k9tkca.png?alt=media)

### Slider Settings

The following settings determine the slider’s available values and appearance:

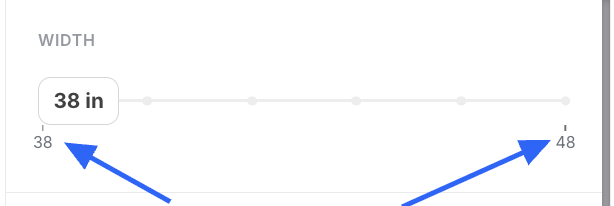
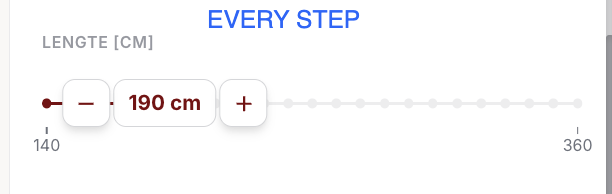
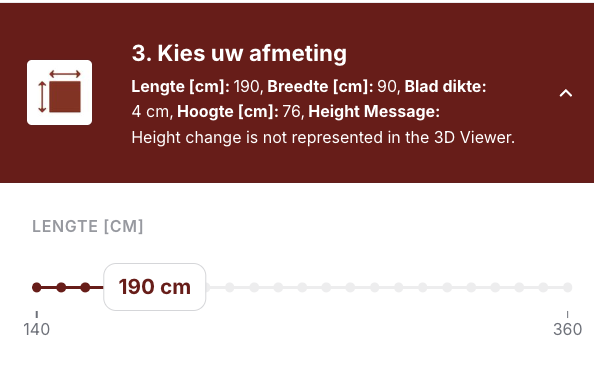
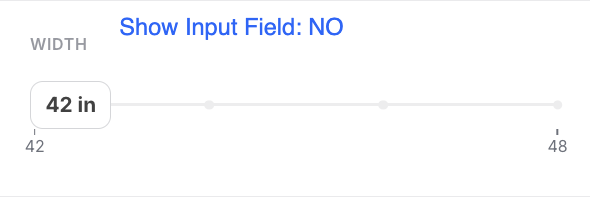
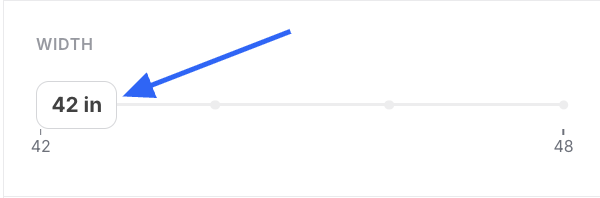
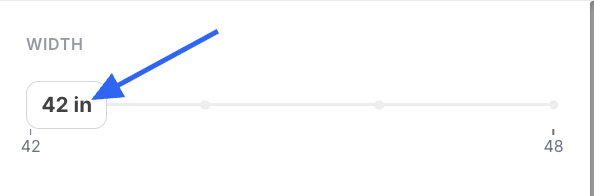
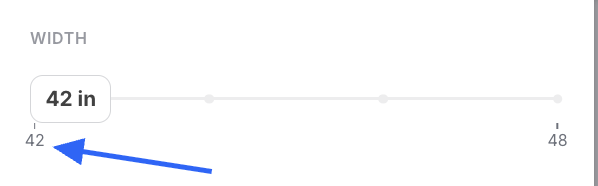
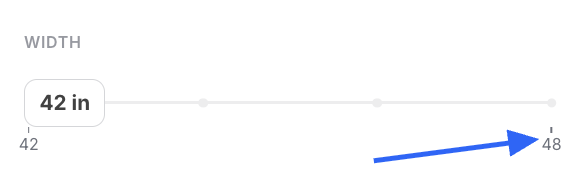
<table data-header-hidden="false" data-header-sticky><thead><tr><th>No.</th><th>Configuration option</th><th>Description</th><th>Gallery</th></tr></thead><tbody><tr><td> 3 </td><td> <strong>Show min/max indicators</strong> </td><td> Displays the first and last available slider values. </td><td> <img src="https://621103948-files.gitbook.io/~/files/v0/b/gitbook-x-prod.appspot.com/o/spaces%2FsqWfi8ifBhTdkvf1vOlY%2Fuploads%2FCamIHYWndzd4xPsQvq0k%2Fmin-max_6qncah.png?alt=media" alt=""> </td></tr><tr><td> 4 </td><td> <strong>Show step indicators</strong> </td><td> Displays markers at every step or at selected intervals.They can be displayed:At every stepEvery two stepsEvery three stepsAt another selected intervalNot at allAvoid showing every indicator when the slider contains many values, as the interface can become crowded. </td><td> <img src="https://621103948-files.gitbook.io/~/files/v0/b/gitbook-x-prod.appspot.com/o/spaces%2FsqWfi8ifBhTdkvf1vOlY%2Fuploads%2FxAXbIABnqDDEocn2LDi8%2Fsteps-1_58wa8q.png?alt=media" alt=""> </td></tr><tr><td> 5 </td><td> <strong>Use team color</strong> </td><td> Applies the configured customer color to selected slider elements </td><td> <img src="https://621103948-files.gitbook.io/~/files/v0/b/gitbook-x-prod.appspot.com/o/spaces%2FsqWfi8ifBhTdkvf1vOlY%2Fuploads%2F0n8XP1sDZaIpYSYucNOh%2Ftheme-colour_8hzac.png?alt=media" alt=""> </td></tr><tr><td> 6 </td><td> <strong>Show input field</strong> </td><td> Adds a field where the customer can enter a value manually. </td><td> <img src="https://621103948-files.gitbook.io/~/files/v0/b/gitbook-x-prod.appspot.com/o/spaces%2FsqWfi8ifBhTdkvf1vOlY%2Fuploads%2FCCZbxDNtAkpBDR756Ioa%2Finput-field-no_s32zid.png?alt=media" alt=""> </td></tr><tr><td> 7 </td><td> <strong>Default value</strong> </td><td> Sets the value selected when the configurator first loads. </td><td> <img src="https://621103948-files.gitbook.io/~/files/v0/b/gitbook-x-prod.appspot.com/o/spaces%2FsqWfi8ifBhTdkvf1vOlY%2Fuploads%2F0VRHPLxA9MFwzklG9M4E%2Fdef-value_zzllo1.png?alt=media" alt=""> </td></tr><tr><td> 8 </td><td> <strong>Unit</strong> </td><td> Displays a measurement unit such as <code>mm</code>, <code>cm</code>, or <code>in</code>. </td><td> <img src="https://621103948-files.gitbook.io/~/files/v0/b/gitbook-x-prod.appspot.com/o/spaces%2FsqWfi8ifBhTdkvf1vOlY%2Fuploads%2F2BhYubeXJj0khzHoj8Bd%2Funit_1sebw44.png?alt=media" alt=""> </td></tr><tr><td> 10 </td><td> <strong>Minimum value</strong> </td><td> Defines the first available value in a range. </td><td> <img src="https://621103948-files.gitbook.io/~/files/v0/b/gitbook-x-prod.appspot.com/o/spaces%2FsqWfi8ifBhTdkvf1vOlY%2Fuploads%2FOfQB5xxV0ghX1eLnbXuF%2Fmin-value_vecdfq.png?alt=media" alt=""> </td></tr><tr><td> 11 </td><td> <strong>Maximum value</strong> </td><td> Defines the last available value in a range. </td><td> <img src="https://621103948-files.gitbook.io/~/files/v0/b/gitbook-x-prod.appspot.com/o/spaces%2FsqWfi8ifBhTdkvf1vOlY%2Fuploads%2F1CaMQVQhFFjo1Rutfd65%2Fmax-value_10bwjm3.png?alt=media" alt=""> </td></tr><tr><td> 12 </td><td> <strong>Step</strong> </td><td> Defines the difference between consecutive values. </td><td> </td></tr><tr><td> 13 </td><td> Update in Real Time </td><td> Controls whether changes are applied while the slider is moving or after it is released. </td><td> </td></tr></tbody></table>

### Updating the Model in Real Time

The **Update in real time** setting controls when the slider value is applied. When it is disabled, the product updates after the customer releases the slider. When it is enabled, the product updates continuously while the customer moves the slider. Every value passed while dragging the slider can trigger rules, calculations, pricing, and scene updates. The more work required at each step, the greater the chance of lag.

#### Real-time updates work best when:

* The slider directly controls a Morph Target.
* The product has a relatively small number of options.
* Only a limited number of rules run after each change.
* Few meshes or materials need to update.
* The slider uses a reasonable number of values. For example, a slider from 1200 to 2400 in steps of 100 or 200 is a suitable use case.

#### Leave real-time updates disabled when:

* The slider contains thousands of small steps.
* Each value triggers some rules (whole block trigger)
* Complex price calculations run after every change.
* Many meshes or materials change.
* Meshes are reloaded when the value changes.
* The entire scene is refreshed. For example, a slider from 1 to 10,000 in steps of 1 should not normally use real-time updates.

### Widget Codes

The standard code, visibility code, and price code fields are assigned to the widget as a whole. They do not change according to the slider’s selected value. If the price must depend on the selected measurement, it needs to be calculated using the appropriate variables and pricing formulas.

## Mimeeq App - How to Load Morph Targets

Once the Morph Targets are prepared and tested in Blender:

1. Export the model as a GLB using the standard export settings.
2. Open the relevant configurator in Mimeeq.
3. Go to the **3D/AR** tab.
4. Upload or select the GLB in the appropriate 3D model field.
5. Save the changes.
6. Use **Reload Meshes** to load the model’s mesh information.
7. Confirm that the Morph Targets from the GLB appear in the **Morph Targets** section.

Mimeeq reads the Morph Target names directly from the uploaded GLB. These names will later be available when creating the **Assign Slider to Morph Target** rule. If multiple meshes contain a Morph Target with the same name—for example, `Width`—they can be connected to the same Slider widget.

![](https://621103948-files.gitbook.io/~/files/v0/b/gitbook-x-prod.appspot.com/o/spaces%2FsqWfi8ifBhTdkvf1vOlY%2Fuploads%2FRDZIBIyRBF6TQInA4uRE%2Fmeshes-mt_1295hjy.png?alt=media)

## Mimeeq App - How to Assign a Slider to a Morph Target

Creating the Slider widget does not automatically connect it to the 3D model. You must create a **rule** using the **Assign Slider to Morph Target** action. To connect the slider:

1. Open the product’s **Rules** section.
2. Create a new rule.
3. Add the **Assign Slider to Morph Target** action.
4. Select the Slider widget.
5. Select the meshes that should respond to the slider.
6. Select the required Morph Target name.
7. Save the rule.

Only meshes containing Morph Targets are available for selection. After selecting the meshes, Mimeeq displays the Morph Target names found on them. The number beside a target name indicates how many selected meshes contain that target. For example, `Width (3)` means that three of the selected meshes contain a Morph Target named `Width`. Repeat this process for each independently controlled property. For example:

* Width slider → `Width` Morph Target
* Length slider → `Length` Morph Target
* Depth slider → `Depth` Morph Target

![](https://621103948-files.gitbook.io/~/files/v0/b/gitbook-x-prod.appspot.com/o/spaces%2FsqWfi8ifBhTdkvf1vOlY%2Fuploads%2FjoPQNOAsgcvHn6tz2Eke%2Fmt-rule_1udm98l.png?alt=media)

### Mimeeq App - Rules with The Slider

#### Slider Values as a Trigger

{% hint style="warning" %}
This means one slider cannot directly detect the value selected on another slider.A specific slider value cannot be used directly as a standard rule trigger in the same way as an individual option.
{% endhint %}

For example, you cannot create rules such as:

* If Length is 140–160 cm, restrict Width to 80–100 cm.
* If Length is 160–180 cm, restrict Width to 90–100 cm.
* If Length is 200 cm, restrict Width to 90–120 cm. The same limitation prevents using a slider value directly to validate a combination and display an error when the selected dimensions are incompatible.

{% hint style="warning" %}
Pelase note that changing the slider can still cause the existing rules, price calculations, and scene to be recalculated. This is particularly important when deciding whether to enable real-time updates.
{% endhint %}

{% hint style="warning" %}
Widget parameters can also be overridden through override widget settings rule. For example, selecting a particular product variant could change the maximum permitted length.
{% endhint %}

## Mimeeq App - Overriding UVs

Changing a mesh’s shape is stretching its existing UV mapping. If the material does not maintain the correct scale or orientation across the slider range, add an **Override UV Settings** action.

To apply the override:

1. Open the product’s **Rules** section.
2. Add the **Override UV Settings** action.
3. Select the affected mesh or meshes.
4. Choose a projection type.
5. Adjust the projection settings.

Object Without (left) and With UV projection (right): ![](https://621103948-files.gitbook.io/~/files/v0/b/gitbook-x-prod.appspot.com/o/spaces%2FsqWfi8ifBhTdkvf1vOlY%2Fuploads%2FEOngLqVoRE4b9bx5XBy5%2Faleksandra-manys-sep-14-2026-1_14xva0b.jpeg?alt=media)

### Projection Types

Two projection types are available:

<table data-header-hidden="false" data-header-sticky><thead><tr><th>Projection type</th><th>Recommended use</th></tr></thead><tbody><tr><td> <strong>Planar</strong> </td><td> Primarily flat surfaces, such as tabletops or panels. </td></tr><tr><td> <strong>Box</strong> </td><td> Objects requiring texture projection across multiple sides. </td></tr></tbody></table>

#### Planar Projection Settings

Planar projection includes settings:

<table data-header-hidden="false" data-header-sticky><thead><tr><th>Setting</th><th>Description</th></tr></thead><tbody><tr><td> <strong>Projection axis</strong> </td><td> Defines the axis from which the texture is projected onto the mesh: X, Y, or Z. Select the axis facing the surface you want to texture. </td></tr><tr><td> <strong>Horizontal tiling</strong> </td><td> Controls how many times the texture repeats horizontally. Higher values create more repetitions and make the texture pattern appear smaller. A tiling value of <code>1</code> fits the complete texture once across the projected surface. </td></tr><tr><td> <strong>Vertical tiling</strong> </td><td> Controls how many times the texture repeats vertically. Higher values create more repetitions and make the texture pattern appear smaller. A tiling value of <code>1</code> fits the complete texture once across the projected surface. </td></tr><tr><td> <strong>Origin</strong> </td><td> Defines the starting position of the planar projection in 3D space using X, Y, and Z coordinates. </td></tr><tr><td> <strong>Rotation</strong> </td><td> Rotates the projected texture on the selected projection plane. </td></tr><tr><td> <strong>Horizontal offset</strong> </td><td> Moves the texture horizontally across the projected surface without changing its scale. </td></tr><tr><td> <strong>Vertical offset</strong> </td><td> Moves the texture vertically across the projected surface without changing its scale. </td></tr></tbody></table>

For a tabletop viewed from above, the relevant projection axis will normally be selected according to the model’s orientation.

#### Box Projection Settings

Box projection includes:

<table data-header-hidden="false" data-header-sticky><thead><tr><th>Setting</th><th>Description</th></tr></thead><tbody><tr><td> <strong>Tiling</strong> </td><td> Controls how many times the texture repeats across the projected surfaces. Higher values create more repetitions and make the texture pattern appear smaller. </td></tr><tr><td> <strong>Origin</strong> </td><td> Defines the starting position of the box projection in 3D space using X, Y, and Z coordinates. </td></tr><tr><td> <strong>Global rotation</strong> </td><td> Rotates the complete box projection around the model. </td></tr><tr><td> <strong>Offset</strong> </td><td> Moves the projected texture across the model without changing its scale. </td></tr><tr><td> <strong>Face rotation</strong> </td><td> Rotates the texture on an individual face of the box projection. </td></tr><tr><td> <strong>Horizontal and vertical face flipping</strong> </td><td> Mirrors the texture horizontally or vertically on selected faces. </td></tr><tr><td> <strong>UV direction swapping</strong> </td><td> Swaps the horizontal and vertical texture directions on a selected face. </td></tr><tr><td> <strong>Edge blending</strong> </td><td> Controls how the projections from adjacent faces transition at the edges. Use it to reduce visible seams, particularly on rounded or angled surfaces. </td></tr></tbody></table>

### Ambient Occlusion Limitation

The UV override affects the main material textures, including the albedo texture, but it does not correctly override baked ambient occlusion maps. Avoid relying on a baked AO map on a morphed mesh whose UV mapping must be overridden. If an AO map is required, test it carefully across the complete slider range.

### Related topics

* [3D Asset Requirements](/configurator/3d-assets/asset-requirements.md) — prepare performant GLB assets with suitable topology and UV channels.
* [Options & widgets](/configurator/options-and-widgets.md) — configure the slider widget that controls the target.
* [Actions Overview](/configurator/rules/actions.md) — understand the rule actions used to connect sliders and update widgets.
* [Dimension Overlay](/configurator/dimensions-and-exports/dimension-overlay.md) — display measurements alongside adjustable product dimensions.

###


---

# Agent Instructions
This documentation is published with GitBook. GitBook is the documentation platform designed so that both humans and AI agents can read, navigate, and reason over technical content effectively. Learn more at gitbook.com.

## Querying This Documentation
If you need additional information that is not directly available in this page, you can query the documentation dynamically by asking a question.

Perform an HTTP GET request on the current page URL with the `ask` query parameter, and the optional `goal` query parameter:

```
GET https://help.mimeeq.com/configurator/advanced-customisation/morph-targets.md?ask=<question>&goal=<endgoal>
```

`ask` is the immediate question: it should be specific, self-contained, and written in natural language.
`goal` is optional and describes the broader end goal you are ultimately trying to accomplish on behalf of the user. GitBook uses it to tailor the answer towards what is most useful for that goal.

The response will contain a direct answer to the question and relevant excerpts and sources from the documentation.

Use this mechanism when the answer is not explicitly present in the current page, you need clarification or additional context, or you want to retrieve related documentation sections.
